In a small kitchen, tableware can quickly crowd the counter: plates lean precariously, mugs fill the wrong shelf, and the drawer sticks. The challenge is not owning perfect cabinets. It is making everyday dishes easy to reach without sacrificing valuable work space. A little trial and error is normal.
Houzz’s 2024 U.S. Kitchen Trends Study found that 76% of homeowners renovating their kitchens upgraded their cabinetry. That figure does not focus specifically on small kitchens, but it highlights how central storage is to kitchen improvements. For renters and homeowners who cannot replace cabinets, simple changes—such as shelf risers, drawer dividers, and vertical plate racks—can make existing storage work harder. Professional organizing consultant Marie Kondo offers a useful guiding principle: “The question of what you want to own is actually the question of how you want to live your life,” in The Life-Changing Magic of Tidying Up. Applied to tableware, that means keeping the dishes you use close and reconsidering rarely used extras.
Small changes matter. This guide shares seven practical ways to approach how to organize tableware efficiently in small kitchens, from sorting plates by frequency of use to storing cups where they are easiest to lift. Measure shelves before buying organizers; a neat-looking rack can still waste space if it does not fit. Test one change at a time, too. The first arrangement may not be the best, and that is worth noticing: your kitchen should support real routines, not an idealized picture.
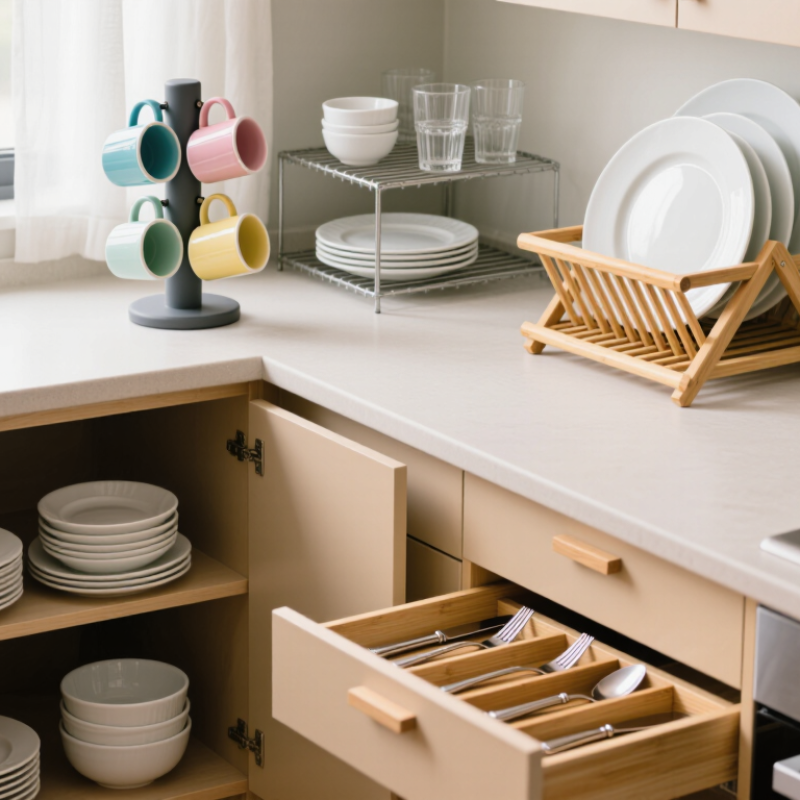
Small kitchens reward precise measuring, not hopeful stacking. The National Kitchen & Bath Association’s Kitchen Planning Guidelines use 24 inches as the standard depth for a base cabinet. Treat that as an exterior baseline, not usable shelf space. A back panel, face frame, hinges, or plumbing can reduce the room inside. Measure from the back wall to the closed door, then check the interior width and height. Measure at two points; cabinets are not always perfectly square.
Tip: Pull out a shelf and note the clear interior dimensions. Measure your largest dinner plate, bowl, and serving platter, including handles. Leave finger space around each item. Tight fits become irritating fast. Small bins help only if they do not block the door.
A 24-inch cabinet may not hold a 24-inch object. Check door clearance and shelf supports before choosing stackers or plate racks. Store everyday dishes where you can reach them without lifting a stack of cookware. A simple sketch with dimensions can prevent a poor purchase, though it is easy to forget the hinges. Recheck them.
In a small kitchen, sort tableware by how often you use it, then place daily plates, bowls, and mugs within easy reach. The U.S. Access Board’s 2010 ADA Standards, Section 308, sets an unobstructed reach range of 15 to 48 inches above the floor. Use that range as a practical organizing benchmark, not a rule that automatically applies to every home. Keep heavy dinner plates on a low shelf, and move occasional serving dishes higher.
Measure from the floor, not the countertop. A shelf that looks reachable can become awkward when a deep counter blocks your approach; ADA guidance limits some obstructed forward reaches to 44 inches. Leave clear space in front of frequently used shelves, too. Small detail, big difference. Group cups near the kettle or coffee area, and store children’s dishes on a low, stable shelf. In practice, I still find that “everyday” items can spread across several cupboards unless the categories are simple.
Try one shelf for plates, one for bowls, and a shallow tray for cutlery. Put rarely used tableware outside the 15–48-inch zone, but avoid stacking heavy items overhead. Recheck the layout while carrying a plate; opening a cupboard door can change what feels reachable. The ADA benchmark offers a measurable starting point, though household needs and mobility vary. A quick adjustment may work better than a perfectly tidy shelf.
Keep frequently used plates, bowls, and cups within the 15–48-inch reach range. Store heavier items on lower shelves and group tableware by how often you use it.
The chart shows the unobstructed forward-reach limits in the 2010 ADA Standards, Section 308.2. Use this as an accessibility benchmark; actual kitchen layouts may vary.
Tip: Measure the shelf opening before choosing a vertical plate rack. Check its clear height, depth, and width, not just the shelf’s outside dimensions. Then measure your largest plate across its widest point. A rack that fits the shelf may still crowd the plates. Allow a little extra room for lifting them out without scraping the shelf above.
Compare the rack’s dividers with your plate diameter and shape. Wide dinner plates need slots that support them securely, while smaller side plates may wobble in overly broad gaps. Check the rack’s stated capacity, but treat it as a guide; plate thickness varies. A quick test with two or three plates can reveal awkward spacing before you load the whole rack.
Tip: Load the heaviest plates near the back or center, where the rack feels most stable, and keep lighter dishes within easy reach. Set the rack on a flat, dry shelf, then gently test whether it shifts when you remove a plate. If the shelf clearance is tight, a lower rack may work better than forcing plates into a cramped space. Measuring twice can feel fussy. It beats discovering the mismatch after unpacking.
In a small kitchen, a cutlery drawer works best when each utensil has a defined place. Measure the drawer before choosing an insert, and leave room for it to close without pressing on handles. Put everyday forks, spoons, and table knives near the front. Store less-used serving pieces toward the back. Keep sharp blades separate. Small change, less rummaging.
Choose compartments that fit your actual cutlery, not an idealized set. If one section keeps overflowing, move duplicate pieces elsewhere instead of forcing the drawer shut. Crumbs can collect beneath dividers, so lift the insert and wipe the drawer regularly. It is easy to over-organize. Recheck the layout after a week; your most-used pieces may not end up where you expected.
The floor route matters too. Aim to keep a 36-inch-wide walkway clear between counters, appliances, and the table where possible. Measure the narrowest point, including space taken by open cabinet or appliance doors. Avoid leaving a chair or waste bin in that route. Treat 36 inches as a practical planning target, not a universal requirement for every kitchen. If space is tight, keep the path consistently unobstructed and check that drawer handles do not collide with passing traffic.
Keep everyday plates and bowls close to the sink, where rinsing and unloading happen. A shallow cabinet or drawer beside the sink can hold the dishes used at breakfast and dinner. Store heavier stacks on a lower shelf, and leave a little room between piles so they are easy to lift without scraping. Cups can sit nearby, but avoid crowding the counter where wet items need to drain. Small change. It can make putting away a clean load feel less like crossing the kitchen with an armful of plates.
The convenient spot still needs to preserve a clear work aisle. The National Kitchen & Bath Association recommends a 42-inch work aisle for one cook, measured between opposing counters, appliances, or tall cabinets. Check the narrowest point, including handles and open appliance doors; a taped floor outline can reveal awkward pinch points before you move dishes. In a compact kitchen, a cabinet door may swing into that space even when the aisle looks wide on a plan. I would rather keep fewer dishes near the sink than make the route past it uncomfortable. This trade-off is easy to miss. Recheck the clearance with someone standing at the counter, since a layout that works on paper may feel cramped during meal prep.
| Tip | Where and How | Practical Planning Detail | Why It Helps |
|---|---|---|---|
| 1. Put daily dishes near the sink | Keep everyday plates and bowls in the closest convenient cabinet to the sink or dishwasher. | Reserve the easiest-to-reach shelf for items used at most meals; keep heavier stacks at a comfortable lifting height. | Shortens the path for unloading clean dishes and setting the table. |
| 2. Store by frequency of use | Group daily tableware together and move occasional-use serving pieces to higher or less accessible storage. | Use the front of shelves for everyday items and reserve back or upper spaces for infrequently used pieces. | Makes commonly used dishes easier to reach without rearranging other items. |
| 3. Separate plates vertically | Use a stable plate rack or dividers inside a cabinet or deep drawer. | Measure the cabinet opening and plate diameter before choosing a rack; leave enough room to remove plates without scraping them. | Makes plates visible and accessible while reducing the need to lift a tall stack. |
| 4. Nest bowls by size | Place compatible bowls together in a cabinet or drawer near the dishwashing area. | Keep a small set of frequently used sizes within easy reach; avoid stacking so high that bowls are difficult to lift out. | Uses vertical cabinet space efficiently and keeps matching pieces together. |
| 5. Give cups and mugs a defined zone | Store cups near the water source or beverage-preparation area, using a shelf or a suitable mug hook system. | Check shelf height and cup-handle clearance before adding hooks; do not overload shelves or mounted hardware. | Keeps cups together and frees shelf space when the storage setup allows it. |
| 6. Store serving pieces out of the daily-use zone | Keep platters, specialty dishes, and extra place settings in upper cabinets or another occasional-use location. | Place heavier pieces on lower, stable shelves rather than overhead storage. | Prevents rarely used items from taking the most accessible space. |
| 7. Protect the work aisle | Keep dish racks, stools, and temporary stacks out of the main work path between opposing counters or appliances. | The NKBA guideline calls for a 42-inch (about 107 cm) work aisle for one cook; it recommends 48 inches (about 122 cm) for multiple cooks. | Maintains room to move and work safely while keeping tableware storage within reach. |
Note: Shelf arrangements and storage targets are practical suggestions; check actual cabinet dimensions, hardware capacity, and local requirements when planning changes.
Measure the shelf’s clear height, depth, and width. Do not rely on outside dimensions.
Leave extra room for lifting plates without scraping the shelf above. Tight spaces become annoying quickly.
Compare divider width with your largest plate. Wide plates need firm support, while small plates may wobble.
Treat capacity as a guide. Plate thickness varies, so test two or three plates before filling the rack.
Put heavy plates near the back or center. Keep lighter dishes closer to the front.
Place it on a flat, dry shelf. Remove one plate gently and watch for shifting.
Store daily plates and bowls near the sink. A shallow cabinet or drawer can reduce carrying distance.
Keep the work aisle about 42 inches wide. Check handles, open doors, and the narrowest point.
Mark the floor with tape. Then stand at the counter and walk through the route.
Choose a lower rack or reduce nearby storage. Almost fitting is often not fitting.
Learning how to organize tableware efficiently in small kitchens begins with measuring cabinet interiors, including their depth, shelf height, and available width. A common base-cabinet depth is 24 inches, but checking your own space helps prevent racks and organizers from blocking doors or wasting room. Sort dishes by how often you use them, and place everyday items within a comfortable reach—roughly 15 to 48 inches from the floor when possible.
Choose vertical plate racks that fit both your shelf clearance and the diameter of your plates, making stacks easier to access. Use drawer inserts to group cutlery, and arrange drawers so they do not obstruct a walkway of about 36 inches. Keep daily dishes near the sink for convenient unloading, while leaving around 42 inches of clear workspace between counters where possible. These simple measurements and habits make a compact kitchen safer, tidier, and easier to use.

Auroch Kitchen